Learn how to use Puppeteer for accurate PDF generation with dynamic JavaScript content, ensuring professional formatting and customization.
Using Puppeteer for JavaScript Rendering in PDFs
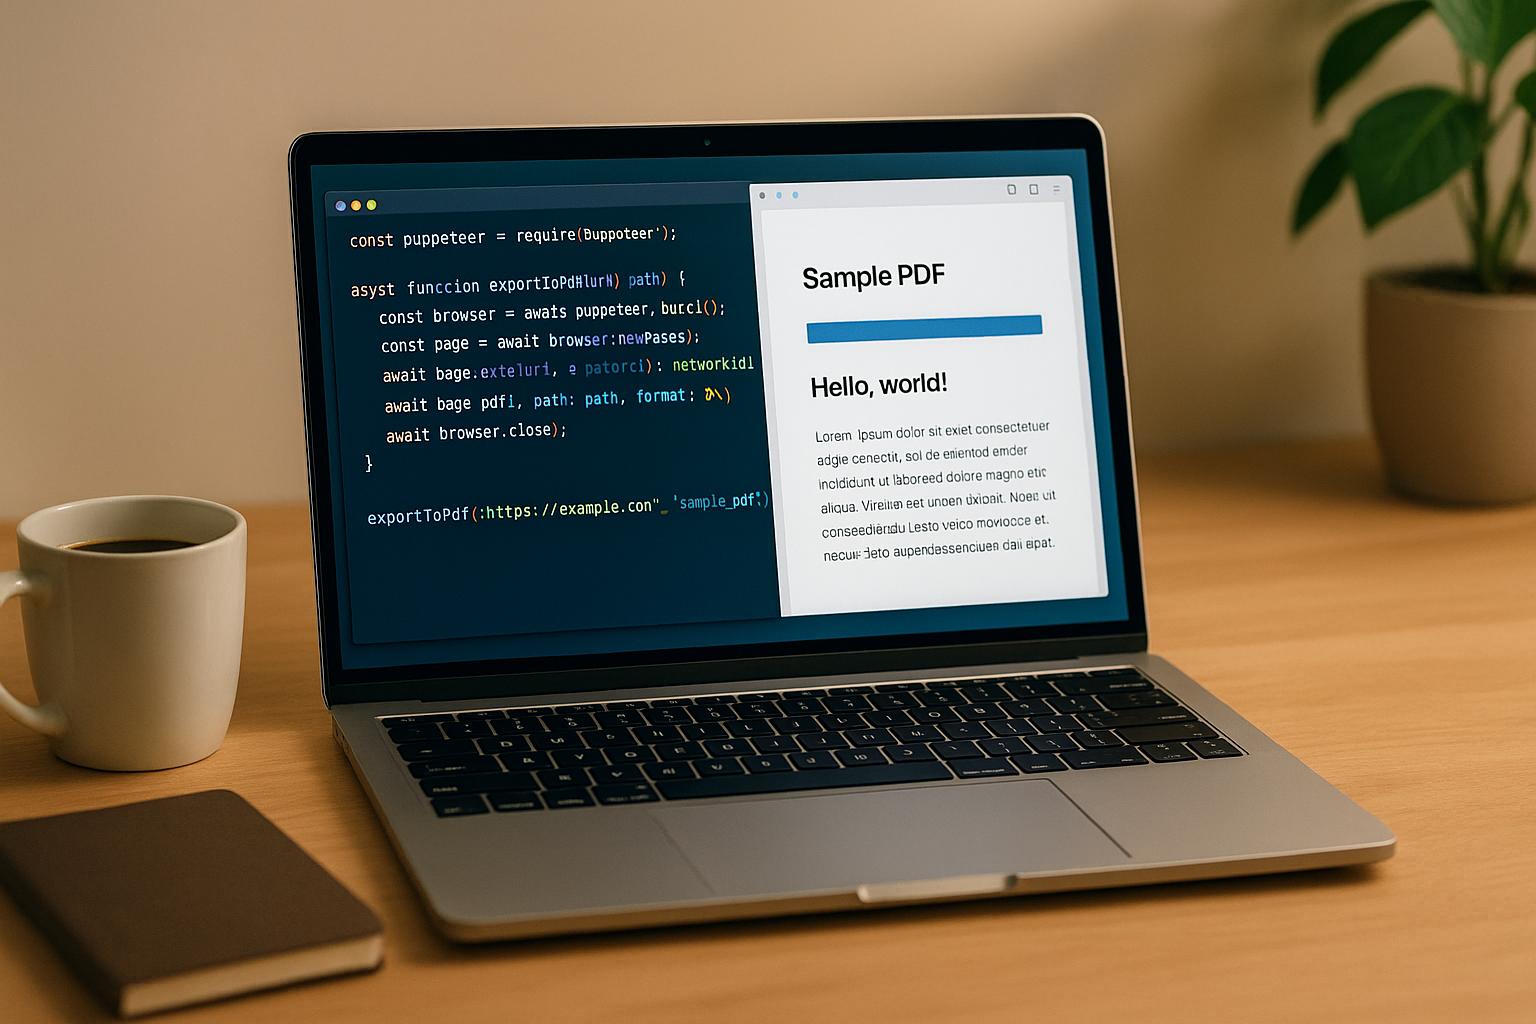
Puppeteer is a Node.js library that automates Chrome or Chromium browsers, making it perfect for generating PDFs with dynamic, JavaScript-heavy content. Unlike traditional HTML-to-PDF tools, Puppeteer fully executes JavaScript, ensuring accurate rendering of modern web applications, including interactive charts, financial documents, and reports.
Key Benefits of Puppeteer for PDF Creation:
- Full JavaScript Execution: Handles client-side rendering (e.g., React, D3.js).
- Precise Formatting: Supports U.S. standards like Letter-sized pages, 1-inch margins, and MM/DD/YYYY dates.
- Dynamic Content: Generates PDFs with real-time data, charts, and interactive forms.
- Customizable Layouts: Control headers, footers, print-specific CSS, and page dimensions.
- Batch Processing: Efficiently creates large volumes of PDFs.
Quick Steps to Get Started:
-
Install Puppeteer:
npm install puppeteer -
Configure for U.S. standards:
const pdfOptions = { format: 'Letter', margin: { top: '1in', right: '1in', bottom: '1in', left: '1in' }, printBackground: true }; -
Load dynamic content:
await page.goto('https://example.com', { waitUntil: 'networkidle2' }); -
Generate the PDF:
await page.pdf(pdfOptions);
Puppeteer is ideal for precise, dynamic PDF generation. For a simpler, cloud-based alternative, consider the HTML2PDF API, which offers features like direct S3 integration and scalable performance without managing infrastructure.
🌐 Convert HTML to PDF with Puppeteer in Node.js 🚀 Full Step-by-Step Guide!
Setting Up Puppeteer for PDF Generation
To get started with Puppeteer for PDF generation, it's important to meet the system requirements and follow best practices to ensure smooth and efficient operation.
System Requirements and Installation
First, make sure you have Node.js version 16+ LTS installed. Puppeteer also requires at least 512 MB of RAM and around 300 MB of disk space for the Chromium browser. If you're using Windows, you’ll need the Visual C++ Redistributable, which is already included in most modern Windows setups.
To install Puppeteer, open your terminal and run:
npm install puppeteer
This command automatically downloads Chromium. A stable internet connection is essential during the installation process.
If you'd rather use your system's existing Chrome installation instead of downloading Chromium, you can install a lighter version of Puppeteer:
npm install puppeteer-core
However, using the bundled Chromium browser ensures consistent results across environments, which is especially important for production-grade PDF generation.
For cases where you need to use a specific Chrome version or operate in restricted environments, you can skip the Chromium download by setting the PUPPETEER_SKIP_CHROMIUM_DOWNLOAD environment variable and providing the path to your Chrome executable.
Once Puppeteer is installed, organizing your project structure is the next step to ensure scalability and maintainability.
Project Structure and Best Practices
Creating a clear and logical project structure helps keep your Puppeteer PDF generation process organized. Here's a recommended layout:
pdf-generator/
├── src/
│   ├── templates/
│   │   ├── invoice.html
│   │   ├── report.html
│   │   └── styles/
│   │       └── print.css
│   ├── utils/
│   │   ├── pdf-generator.js
│   │   └── html-processor.js
│   └── config/
│       └── puppeteer-config.js
├── output/
├── temp/
├── package.json
└── .env
- Templates folder: Store HTML templates and CSS files here. Separate print-specific styles (like
print.css) from standard web styles to avoid conflicts. - Utils folder: Use this for reusable functions, such as PDF generation scripts or HTML processors.
- Config folder: Keep Puppeteer configuration settings in this folder for easy management.
- Output folder: Save generated PDFs here for better organization.
- Temp folder: Use this for intermediate files, which can be cleared regularly to maintain a clean workspace.
Adding proper error logging is also essential. It helps you quickly identify and resolve issues with Puppeteer.
Configuring Puppeteer for U.S. Standards
U.S. business documents often follow specific formatting rules, which may differ from international practices. After setting up Puppeteer, you’ll need to configure it to meet these standards.
Page Size and Margins
In the U.S., the standard paper size is Letter (8.5" × 11"), not A4. You can set this in Puppeteer’s options:
const pdfOptions = {
  format: 'Letter',
  margin: {
    top: '1in',
    right: '1in',
    bottom: '1in',
    left: '1in'
  }
};
Margins are typically 1 inch on all sides for standard business documents. For legal documents, consider using a 1.5-inch left margin to allow for binding.
Currency and Date Formatting
Make sure your HTML templates include proper U.S. currency formatting, such as dollar signs and comma separators (e.g., $1,234.56). Puppeteer will render the content exactly as it appears in the HTML, so handle formatting beforehand.
For dates, follow the U.S. convention of MM/DD/YYYY. For example, display "12/31/2025" instead of "31/12/2025."
Applying Print Styles
Ensure that print-specific CSS styles are applied by setting the media type to "print":
await page.emulateMediaType('print');
This step ensures that your print styles, such as those in print.css, are correctly applied during PDF generation.
Font Choices
Stick to web-safe fonts like Arial, Times New Roman, or Georgia for a professional look. If you need custom fonts, remember that they require additional setup and can increase the file size.
Performance Optimization
To improve performance and compatibility, especially in server environments with limited resources, disable unnecessary features in Puppeteer:
const browser = await puppeteer.launch({
  args: [
    '--no-sandbox',
    '--disable-setuid-sandbox',
    '--disable-dev-shm-usage',
    '--disable-web-security'
  ]
});
These settings help streamline the PDF generation process, ensuring it runs efficiently even under resource constraints.
Creating Dynamic Content with Puppeteer
Dynamic content can turn plain PDFs into engaging and functional documents, especially when incorporating real-time data, interactive charts, or content that adapts to user input. Puppeteer is particularly effective at managing JavaScript-heavy pages, making it a go-to tool for such tasks. Here's how to load and handle content while ensuring scripts run to completion.
Loading HTML Content
Puppeteer offers several ways to load HTML content, depending on your needs. The easiest method is loading content from a URL using page.goto(). This is ideal when your content is hosted and includes all required JavaScript files:
const browser = await puppeteer.launch();
const page = await browser.newPage();
await page.goto('https://yoursite.com/dynamic-report', {
  waitUntil: 'networkidle2'
});
Alternatively, use page.setContent() to define HTML content programmatically. This is handy when working with templates or generating HTML dynamically:
const htmlContent = `
<!DOCTYPE html>
<html>
<head>
  <script src="https://cdn.jsdelivr.net/npm/chart.js"></script>
  <style>
    body { font-family: Arial, sans-serif; margin: 1in; }
    .currency { color: #2e7d32; font-weight: bold; }
  </style>
</head>
<body>
  <h1>Sales Report - ${new Date().toLocaleDateString('en-US')}</h1>
  <canvas id="salesChart" width="400" height="200"></canvas>
  <script>
    // Chart will be created here
  </script>
</body>
</html>`;

await page.setContent(htmlContent, { waitUntil: 'networkidle0' });
When using external JavaScript libraries like Chart.js or D3.js, ensure they're included before your custom scripts. These scripts will run sequentially, just as they would in a browser.
To customize content with runtime data, you can use page.evaluate():
await page.evaluate((salesData) => {
  const ctx = document.getElementById('salesChart').getContext('2d');
  new Chart(ctx, {
    type: 'bar',
    data: {
      labels: salesData.months,
      datasets: [{
        label: 'Revenue ($)',
        data: salesData.revenue,
        backgroundColor: '#1976d2'
      }]
    }
  });
}, { months: ['Jan', 'Feb', 'Mar'], revenue: [45000, 52000, 48000] });
After loading the content, make sure all dynamic scripts have finished executing.
Waiting for JavaScript to Complete
Handling dynamic content often means waiting for JavaScript to finish running. Puppeteer offers several strategies to address this, depending on your situation.
The networkidle0 option waits until no network requests are active for at least 500 milliseconds, making it useful for pages relying on API data or external sources:
await page.goto('https://dashboard.example.com', {
  waitUntil: 'networkidle0',
  timeout: 30000
});
For quicker results, use networkidle2, which waits until there are only two or fewer network requests:
await page.goto('https://reports.example.com', {
  waitUntil: 'networkidle2'
});
For more control, page.waitForFunction() allows you to wait for specific conditions, such as ensuring a chart is fully rendered:
await page.waitForFunction(() => {
  const chart = document.querySelector('#salesChart');
  return chart && chart.complete;
}, { timeout: 10000 });
You can also wait for specific elements to appear using page.waitForSelector():
await page.waitForSelector('.financial-summary', { visible: true });
await page.waitForSelector('#chart-container canvas');
If timing is critical, set custom timeouts to avoid indefinite waits:
try {
  await page.waitForFunction(() => {
    return document.querySelector('#dynamicContent').children.length > 0;
  }, { timeout: 15000 });
} catch (error) {
  console.log('Content took too long to load, proceeding anyway');
}
Creating Common U.S. Content Types
Once scripts have completed, you can structure your content to align with U.S. document standards. This includes formatting for currency, dates, and charts. Puppeteer makes it easy to handle these elements with proper HTML and JavaScript.
Currency Formatting is essential for financial documents. Use JavaScript's Intl.NumberFormat to ensure amounts are displayed consistently:
await page.evaluate(() => {
  const amounts = [1234.56, 45678.90, 123456.78];
  const formatter = new Intl.NumberFormat('en-US', {
    style: 'currency',
    currency: 'USD'
  });

  amounts.forEach((amount, index) => {
    const element = document.querySelector(`#amount-${index + 1}`);
    if (element) {
      element.textContent = formatter.format(amount);
    }
  });
});
Date Formatting should follow U.S. conventions (MM/DD/YYYY). Use JavaScript to format dates before generating your PDF:
await page.evaluate(() => {
  const today = new Date();
  const options = {
    year: 'numeric',
    month: '2-digit',
    day: '2-digit',
    timeZone: 'America/New_York'
  };

  document.querySelector('#report-date').textContent = today.toLocaleDateString('en-US', options);

  // For invoice due dates (30 days from now)
  const dueDate = new Date(today.getTime() + (30 * 24 * 60 * 60 * 1000));
  document.querySelector('#due-date').textContent = dueDate.toLocaleDateString('en-US', options);
});
Dynamic Charts can be created by ensuring data is loaded before rendering:
await page.setContent(`
<!DOCTYPE html>
<html>
<head>
  <script src="https://cdn.jsdelivr.net/npm/chart.js"></script>
  <style>
    .chart-container { width: 600px; margin: 20px auto; }
    .summary { text-align: center; margin: 20px; }
  </style>
</head>
<body>
  <div class="summary">
    <h2>Q4 2025 Sales Performance</h2>
    <p>Report generated on <span id="report-date"></span></p>
  </div>
  <div class="chart-container">
    <canvas id="salesChart"></canvas>
  </div>
</body>
</html>
`);

// Inject data and create chart
await page.evaluate(() => {
  document.getElementById('report-date').textContent = new Date().toLocaleDateString('en-US');

  const ctx = document.getElementById('salesChart').getContext('2d');
  new Chart(ctx, {
    type: 'line',
    data: {
      labels: ['October', 'November', 'December'],
      datasets: [{
        label: 'Sales Revenue',
        data: [125000, 142000, 158000],
        borderColor: '#1976d2',
        backgroundColor: 'rgba(25, 118, 210, 0.2)'
      }]
    },
    options: {
      responsive: true,
      maintainAspectRatio: false
    }
  });
});
sbb-itb-bf53d11
Customizing PDFs with Puppeteer
Once your dynamic content is loaded, Puppeteer’s PDF generation tools can help you create professional, polished documents that meet U.S. standards. With its page.pdf() method, you can tweak page sizes, margins, headers, footers, and metadata to ensure your PDFs look sharp and ready for business.
Basic PDF Generation
Creating a PDF with Puppeteer is straightforward, but even the basics can benefit from a few useful configurations. Here’s an example of generating a PDF after loading your content:
const browser = await puppeteer.launch();
const page = await browser.newPage();

// Load your content (from earlier steps)
await page.goto('https://yoursite.com/report', {
  waitUntil: 'networkidle2'
});

// Generate PDF with basic options
const pdf = await page.pdf({
  format: 'Letter',
  printBackground: true,
  path: './reports/sales-report.pdf'
});

await browser.close();
The format: 'Letter' setting ensures the PDF uses the standard U.S. page size. Enabling printBackground: true ensures that any CSS background colors or images are included, which is critical for branded documents or visuals like charts.
Want dynamic filenames? Use the current date to name your PDF:
const today = new Date();
const dateString = today.toISOString().split('T')[0]; // Format: YYYY-MM-DD
const filename = `financial-report-${dateString}.pdf`;

const pdf = await page.pdf({
  format: 'Letter',
  printBackground: true,
  path: `./reports/${filename}`
});
If you’d rather not save the file to disk, you can work with the PDF data directly as a buffer:
const pdfBuffer = await page.pdf({
  format: 'Letter',
  printBackground: true
});

// Use the buffer for emailing, uploading, etc.
console.log(`PDF generated: ${pdfBuffer.length} bytes`);
Now that you’ve got the basics down, let’s dive into advanced options for fine-tuning your PDFs.
Advanced PDF Options
For more complex documents, Puppeteer offers a range of advanced settings to help you customize layouts, margins, and metadata.
Page orientation and margins are key to creating professional layouts. For standard business documents, portrait orientation with 1-inch margins is common:
const pdf = await page.pdf({
  format: 'Letter',
  landscape: false,
  margin: {
    top: '1in',
    right: '1in',
    bottom: '1in',
    left: '1in'
  },
  printBackground: true,
  preferCSSPageSize: false
});
For layouts like wide tables or financial reports, landscape orientation works better:
const pdf = await page.pdf({
  format: 'Letter',
  landscape: true,
  margin: {
    top: '0.75in',
    right: '0.5in',
    bottom: '0.75in',
    left: '0.5in'
  },
  printBackground: true
});
Headers and footers can make multi-page documents feel more polished. Here’s how to add dynamic headers and footers:
const pdf = await page.pdf({
  format: 'Letter',
  margin: {
    top: '1.5in',
    right: '1in',
    bottom: '1.5in',
    left: '1in'
  },
  displayHeaderFooter: true,
  headerTemplate: `
    <div style="font-size: 10px; width: 100%; text-align: center; color: #666;">
      <span style="float: left;">Confidential Business Report</span>
      <span style="float: right;">${new Date().toLocaleDateString('en-US')}</span>
    </div>
  `,
  footerTemplate: `
    <div style="font-size: 10px; width: 100%; text-align: center; color: #666;">
      <span style="float: left;">© 2025 Your Company Name</span>
      <span style="float: right;">Page <span class="pageNumber"></span> of <span class="totalPages"></span></span>
    </div>
  `,
  printBackground: true
});
Metadata adds an extra layer of organization and makes your PDF easier to locate:
// Set metadata before generating the PDF
await page.evaluate(() => {
  document.title = 'Q4 2025 Financial Report';
});

const pdf = await page.pdf({
  format: 'Letter',
  margin: { top: '1in', right: '1in', bottom: '1in', left: '1in' },
  tagged: true,
  printBackground: true
});
Page breaks and scaling let you control how content fits across pages:
// Inject CSS for page breaks
await page.addStyleTag({
  content: `
    .page-break { page-break-after: always; }
    .no-break { page-break-inside: avoid; }
    @media print {
      body { -webkit-print-color-adjust: exact; }
    }
  `
});

const pdf = await page.pdf({
  format: 'Letter',
  scale: 0.8,
  margin: { top: '1in', right: '1in', bottom: '1in', left: '1in' },
  printBackground: true
});
Working with Units and Measurements
Puppeteer supports various units for margins and dimensions, so you can use the system that works best for your project.
For U.S. documents, imperial units are standard:
const pdf = await page.pdf({
  width: '8.5in',
  height: '11in',
  margin: {
    top: '1in',
    right: '0.75in',
    bottom: '1in',
    left: '0.75in'
  }
});
For precision, metric units are an option:
const pdf = await page.pdf({
  width: '215.9mm',
  height: '279.4mm',
  margin: {
    top: '25.4mm',
    right: '19.05mm',
    bottom: '25.4mm',
    left: '19.05mm'
  }
});
Need maximum control? Pixel units offer exact measurements:
const pdf = await page.pdf({
  width: '612px',
  height: '792px',
  margin: {
    top: '72px',
    right: '54px',
    bottom: '72px',
    left: '54px'
  }
});
For documents that need to adapt to different formats, you can create responsive layouts:
const pageFormats = {
  letter: { width: '8.5in', height: '11in' },
  legal: { width: '8.5in', height: '14in' },
  tabloid: { width: '11in', height: '17in' }
};

const selectedFormat = 'letter';
const dimensions = pageFormats[selectedFormat];

const pdf = await page.pdf({
  width: dimensions.width,
  height: dimensions.height,
  margin: {
    top: selectedFormat === 'tabloid' ? '0.5in' : '1in',
    right: '0.75in',
    bottom: selectedFormat === 'tabloid' ? '0.5in' : '1in',
    left: '0.75in'
  },
  printBackground: true
});
When switching between units, remember that Puppeteer handles each measurement independently, so consistency is key. Stick to one unit system throughout your configuration to avoid layout issues.
Using HTML2PDF API for Advanced PDF Creation
If managing browsers and servers sounds like a hassle, the HTML2PDF API offers a cloud-based solution to simplify the process. Instead of handling browser control and infrastructure yourself, this API takes care of JavaScript rendering and PDF creation for you.
Overview of HTML2PDF API
Building on the concepts behind tools like Puppeteer, the HTML2PDF API provides a ready-to-use option that eliminates the need for direct browser management. It converts HTML into PDFs (and other formats) while supporting advanced features like dynamic JavaScript rendering. This makes it capable of handling complex content such as charts, interactive elements, and real-time data updates. Plus, it allows for customization of page dimensions, margins, headers, footers, and metadata.
For businesses working with sensitive data, the API includes direct integration with AWS S3 buckets. This means you can securely deliver files straight to your S3 storage, minimizing intermediate handling and enhancing security.
Key Features of HTML2PDF API
Here’s what makes HTML2PDF API a strong choice for production environments:
- Dynamic JavaScript Rendering: Ensures that all JavaScript is fully executed before the PDF is generated.
- Flexible API Options: Offers synchronous calls for quick PDF generation or asynchronous processing for larger, more complex documents.
- Direct S3 Integration: Delivers files directly to your S3 bucket with options for custom naming and folder organization.
- Multiple Output Formats: Beyond PDFs, you can create images, videos, or HTML files - perfect for use cases like social media previews or video thumbnails.
- Advanced Rendering Controls: Customize your output by blocking specific resources, adding authentication headers, or tweaking rendering parameters via the API.
When to Use HTML2PDF API vs. Puppeteer
The table below compares HTML2PDF API with Puppeteer to help you decide which tool fits your needs:
| Factor | Puppeteer | HTML2PDF API |
|---|---|---|
| Setup Complexity | Requires server setup and browser management | Simple API integration with no infrastructure |
| Cost Structure | Must manage server costs and maintenance | Predictable pricing: $17/month for 5,000 conversions |
| Scalability | Manual scaling required | Automatic scaling with up to 200 requests/min (Enterprise plan) |
| Control Level | Full control over browser behavior and logic | Standardized options with customization |
| Security | Handled on your infrastructure | Direct S3 integration for secure file delivery |
| Development Time | Requires significant setup and error handling | Quick implementation with simple API calls |
Choose Puppeteer if you need complete control over the PDF generation process or have highly customized requirements. On the other hand, HTML2PDF API is ideal if you want to focus on your core application, take advantage of built-in scalability, or require secure file delivery directly to S3.
For many teams, HTML2PDF API strikes the perfect balance between functionality and ease of use. With a free tier offering 50 conversions per month for testing and a Pro plan at $17/month for 5,000 conversions (with up to 100 requests per minute), it provides a straightforward, cost-effective solution for PDF creation.
Conclusion
Generating PDFs with dynamic JavaScript content requires careful setup and precise execution. Puppeteer provides granular control over the browser environment, ensuring that JavaScript runs completely and the resulting PDF accurately represents your dynamic content. By configuring a browser instance, loading your HTML, and waiting for scripts to finish, you can create polished, professional PDFs.
For developers comfortable managing server infrastructure, Puppeteer is a strong option. It allows you to customize every detail of the rendering process - like viewport size and network settings - making it ideal for specialized use cases or seamless integration into Node.js applications. Its flexibility is unmatched for those who prefer a hands-on approach.
However, if managing infrastructure isn’t your preference, a managed solution can simplify things. The HTML2PDF API offers a streamlined alternative with features like direct S3 integration and the ability to handle high-volume requests. With pricing starting at $17 per month for 5,000 conversions and plans supporting up to 200 API requests per minute, it’s a scalable option that minimizes maintenance while still delivering powerful JavaScript rendering.
The choice ultimately depends on your project’s needs and resources. For smaller projects or prototypes, Puppeteer’s free and open-source framework is a great fit. But as your application grows and demands more reliable, maintenance-free PDF generation, a managed service like HTML2PDF API becomes a compelling solution.
Whether you opt for Puppeteer’s hands-on flexibility or the efficiency of HTML2PDF API, you’re equipped to create high-quality PDFs that fully capture dynamic JavaScript content. The critical step is ensuring all JavaScript executes before generating the final document.
FAQs
What are the benefits of using Puppeteer to create PDFs with dynamic JavaScript content?
Puppeteer stands out as a powerful tool for creating PDFs from web pages with dynamic JavaScript content. Using a headless Chrome browser, it can execute JavaScript seamlessly and render even the most intricate, interactive web pages. This means dynamic features like charts, animations, and client-side updates are accurately captured in the final PDF.
What sets Puppeteer apart from traditional methods is its exceptional ability to handle modern, JavaScript-heavy websites. By simulating a real browser environment, it ensures your PDFs look just like the original web content, preserving responsive designs and advanced styles with precision.
How can I format PDFs created with Puppeteer to meet U.S. business standards?
When creating PDFs that align with U.S. business document standards, stick to the standard letter size of 8.5 x 11 inches with 1-inch margins on all sides. Ensure the formatting is consistent by using left-aligned text, line spacing between 1.0 and 1.15, and professional fonts like Times New Roman or Arial.
For a more refined presentation, consider using CSS to manage headers, footers, and page breaks. This approach ensures a clean, professional layout that matches typical U.S. business expectations.
How can I manage dynamic content and ensure JavaScript runs properly when generating PDFs with Puppeteer?
When working with dynamic content in Puppeteer, ensuring JavaScript executes properly is key. One effective method is using page.waitForFunction(), which pauses processing until specific conditions or elements confirm that the content has fully loaded. Another helpful approach is setting the waitUntil option in navigation methods - like networkidle0 or networkidle2 - to make sure all scripts and network activity have finished before creating the PDF.
For pages heavy on JavaScript, explicitly waiting for a network idle state is crucial. This ensures all dynamic elements are fully rendered and ready. These techniques are essential for generating accurate and reliable PDFs, even when dealing with complex or interactive pages.
